
If you missed Take 1 and Take 2 in this series, you may want to back track and start there. Our kitchen remodel was featured in the last post; and the change was pretty dramatic, so be sure to check it out!
Dining rooms have definitely gotten shafted over the years, and I can understand why. They’re too formal! They’re never used. It’s a waste of space! Look, I get it because in our previous house, my dining room table became the hot spot for folding clothes so at least it was used a night or two a week.
Call me old school, but I truly value sitting down together for dinner most nights and talking about our day. Sometimes, it’s the most conversation I’ll get from my kids or husband. What was great about the day? What sucked about today? Which food will we complain about today? You never know what you’ll get at the dinner table; but hey, at least it’s teaching kids the lost art of conversation so just roll with it.
It seems that everyone is in a constant state of feeling rushed 24/7 so that we often are eating while we’re driving or standing up or checking our email. We’ve lost a sense of connection and conversation during dinner. We are consistently interrupted by social media dings, text alerts, and phone calls. We all know there’s an expectation held by most that our cell phones are to be in our hand 24/7, and that we should be on standby at everyone’s beckoned call whenever they wish. Am I right? No wonder we have so much anxiety!
So let’s get back to sharing at least one meal a day with our family (yes-at the same time) while utilizing our forgotten dining rooms. Put the phone away. Stop with the excuses because it can wait!
Alright, now that I’ve finished my lecture on the downfall of the American family, let’s get to the real reason you’re here. You want to see some before and after magic so here it goes! Check out our dining room pre-remodel.
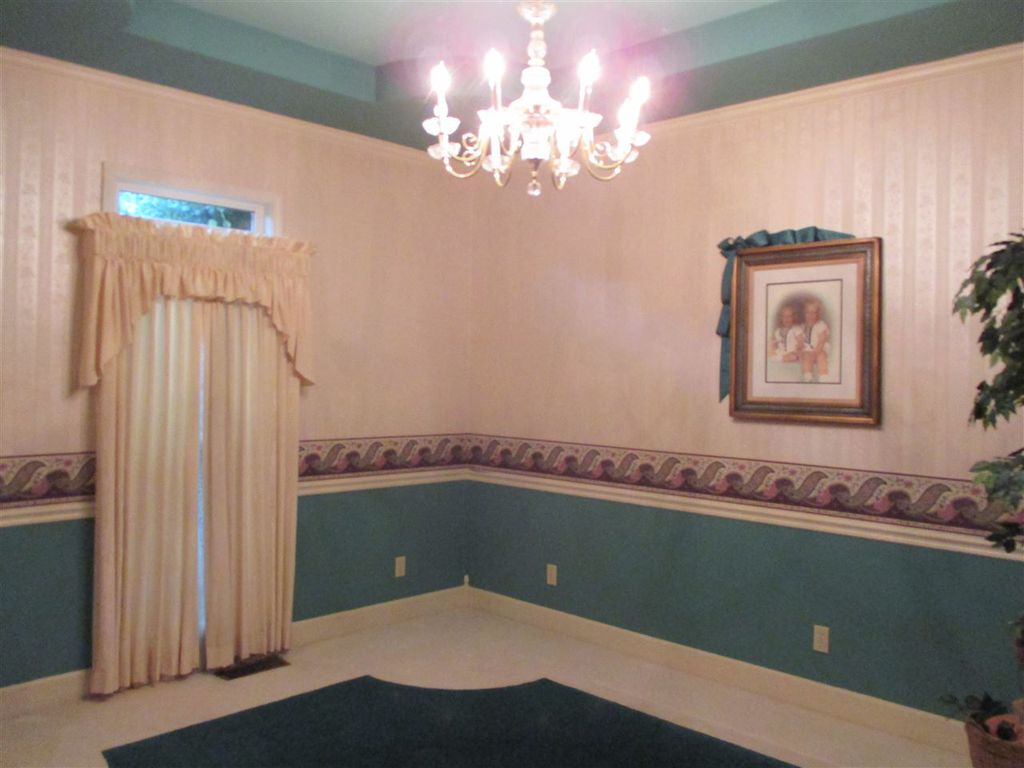
So there’s a lot going on in this room. We have wallpaper, border, and paint to contend with along with a chair rail that we really don’t need. The natural lighting is blocked by heavy curtains, and the carpet pattern matches the tray ceiling to a tee. The crown and base molding appear too small for the height and size of the room, and the light fixture is dated.
What you don’t see in the picture is the shared wall between the dining room and kitchen. The two rooms are closed off from one another, and there was a rather small opening from the dining room into the living room that wasn’t big enough to make it feel like a true open concept.
For the demo, the chair rails, along with the crown and base molding were removed. The border and wallpaper were steamed off, which is a total pain so think twice about using wallpaper in the future folks! If you can’t live without it, pick a small room to wallpaper and get your fix. You won’t regret keeping it minimal!
Next, the carpet had to go even though it still felt plush after 25 years. I wasn’t feeling the pattern, and I’m just not a carpet person even if it does feel amazing to my piggies. The light fixture obviously would be replaced, and the curtains were removed and sewn into a dress. Ha! Just making sure you’re still with me there!
My goal was to really open up the kitchen to the dining room without losing an entire wall of cabinets. There were cabinets lining the lower and upper halves of the shared wall. We removed the upper cabinets only, and made the shared wall into a half wall. It was the perfect solution!
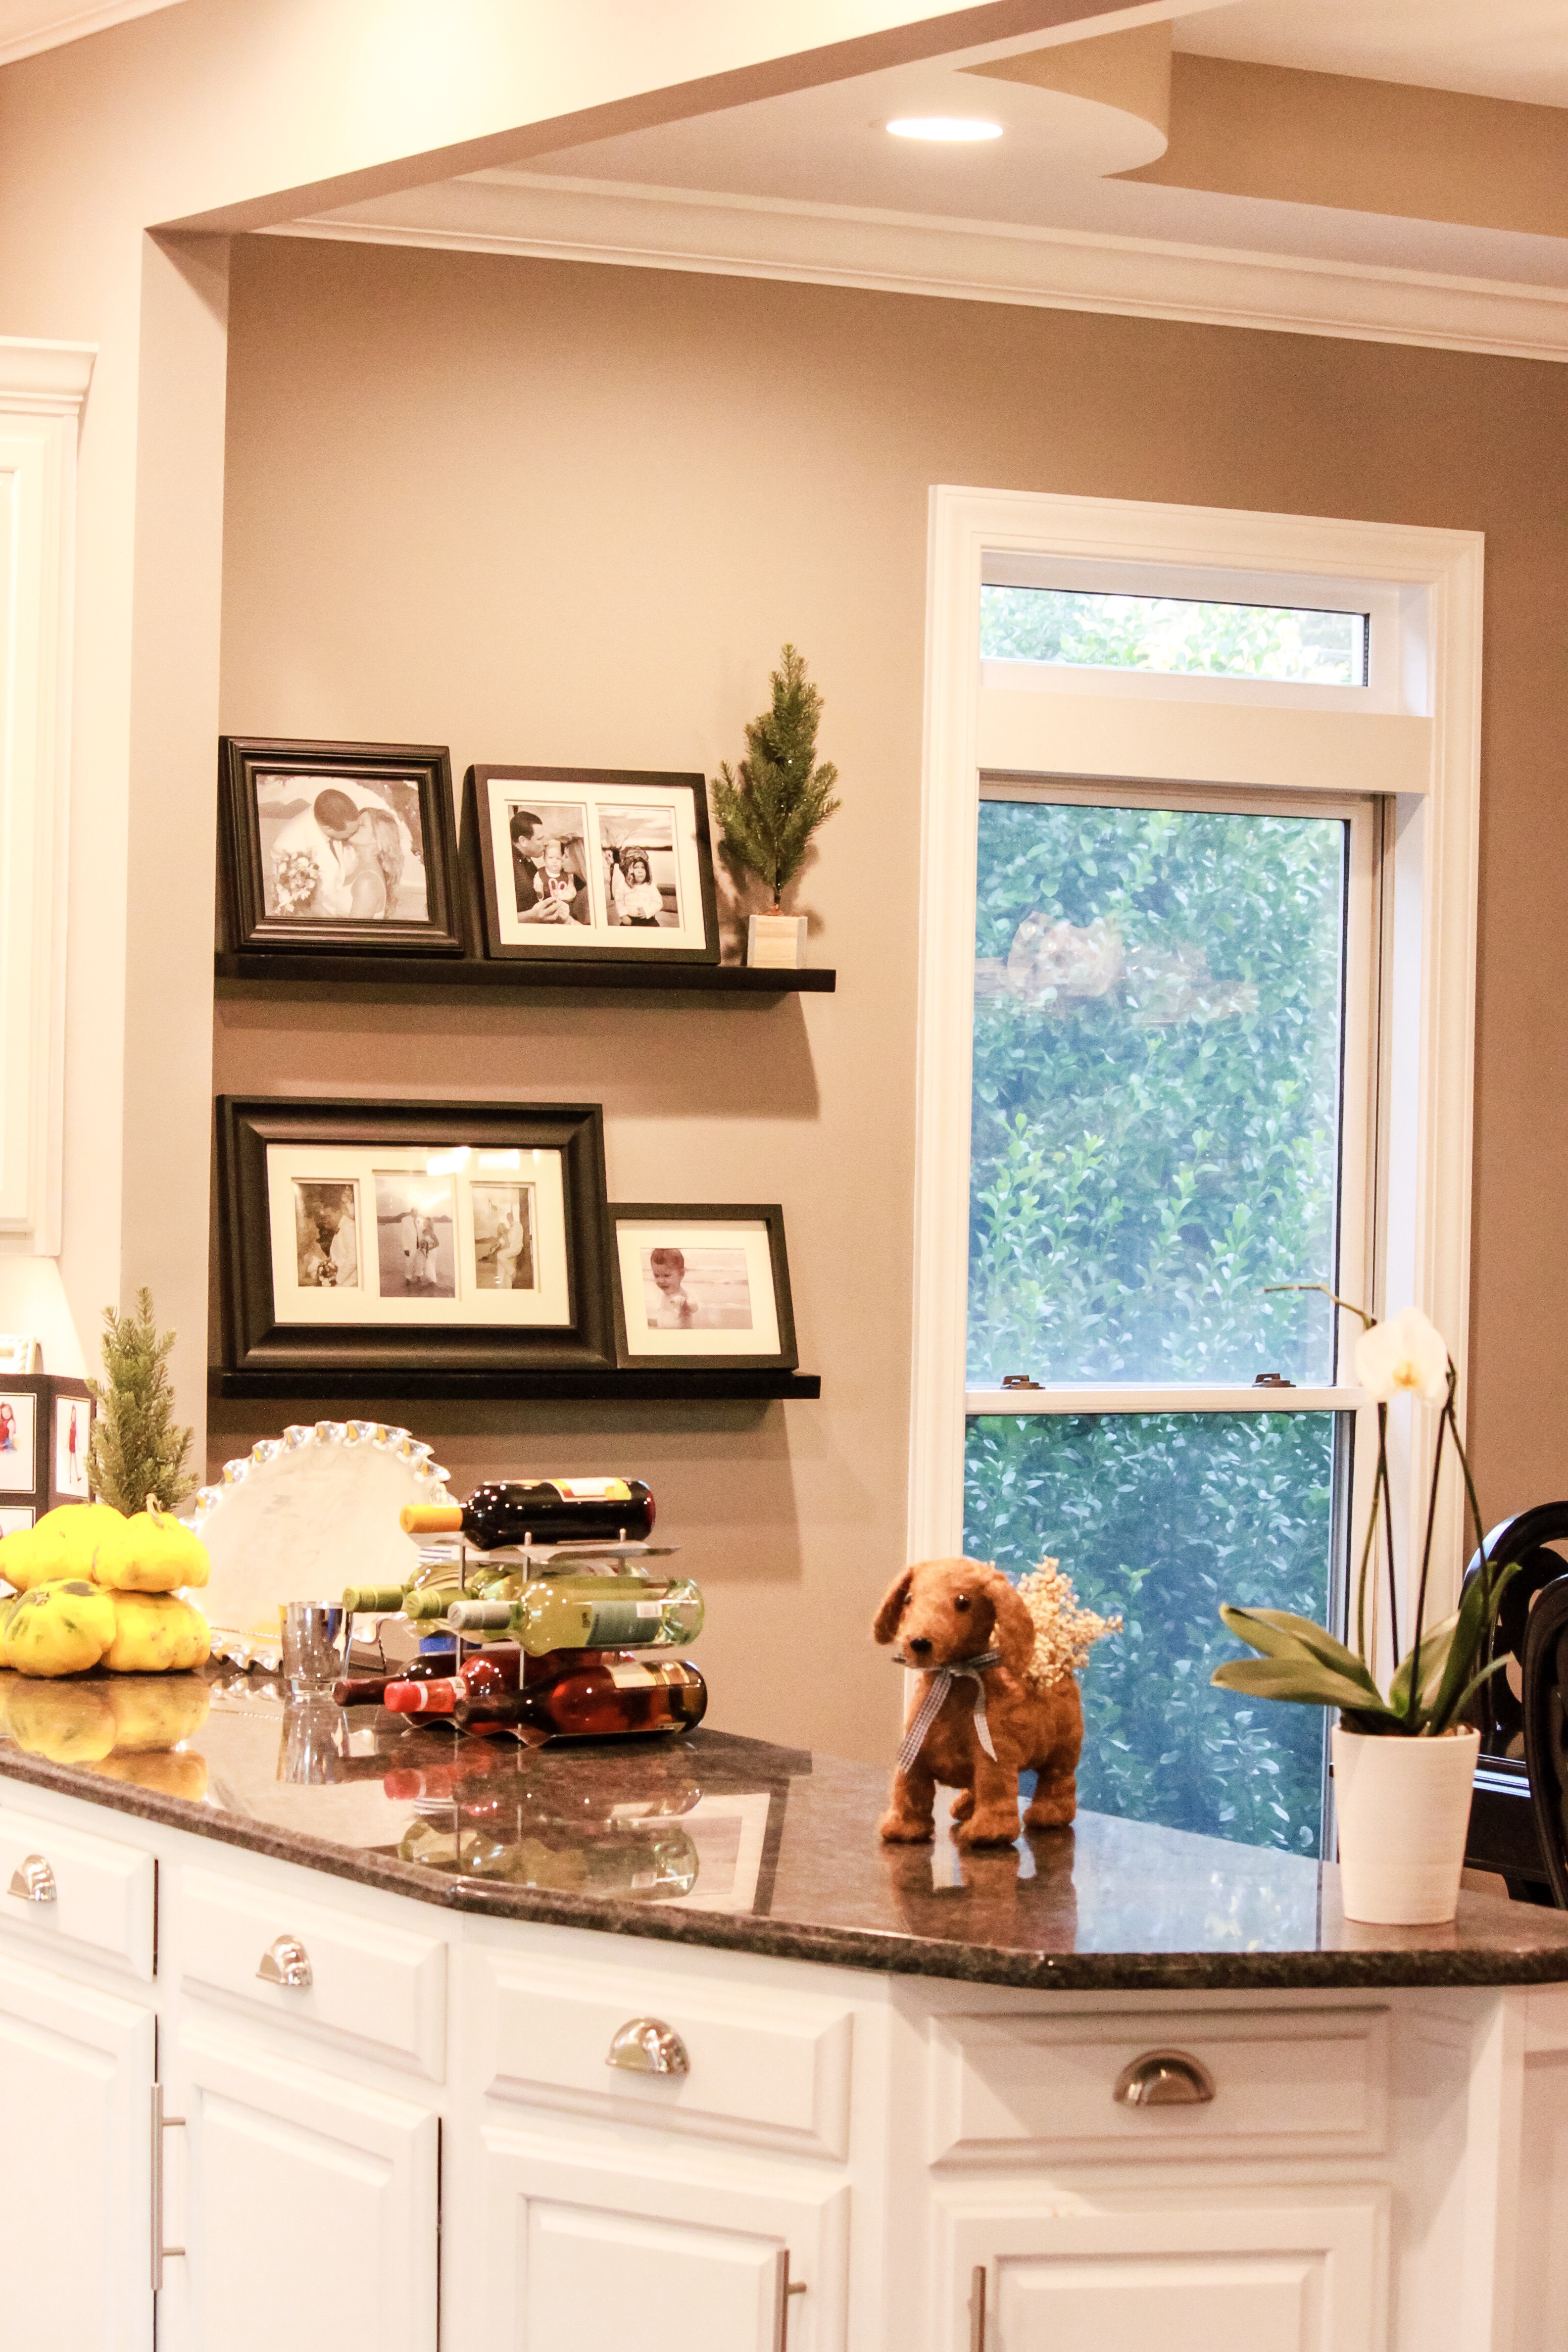
The counter top adjoining the two rooms became the perfect place to set out food while entertaining so that guests in the dining room could grab items without having to walk into the kitchen. Even better, you can be prepping food in the kitchen while not missing a beat of gossip going on with your guests in the dining room. Definite score! Knocking out the upper portion of that wall allowed the dining room to be a distinctive area with a designated function but with all the perks of an open concept.
We also made the opening from the dining room to living room much larger for a more dramatic open concept feel. My husband, John, raised the headers and widened the openings as far as possible without compromising the foundational structure of the wall. It completely changed the look and the feel of the space. Everything seemed more airy and lighter, and made a perfect large area for entertaining crowds.
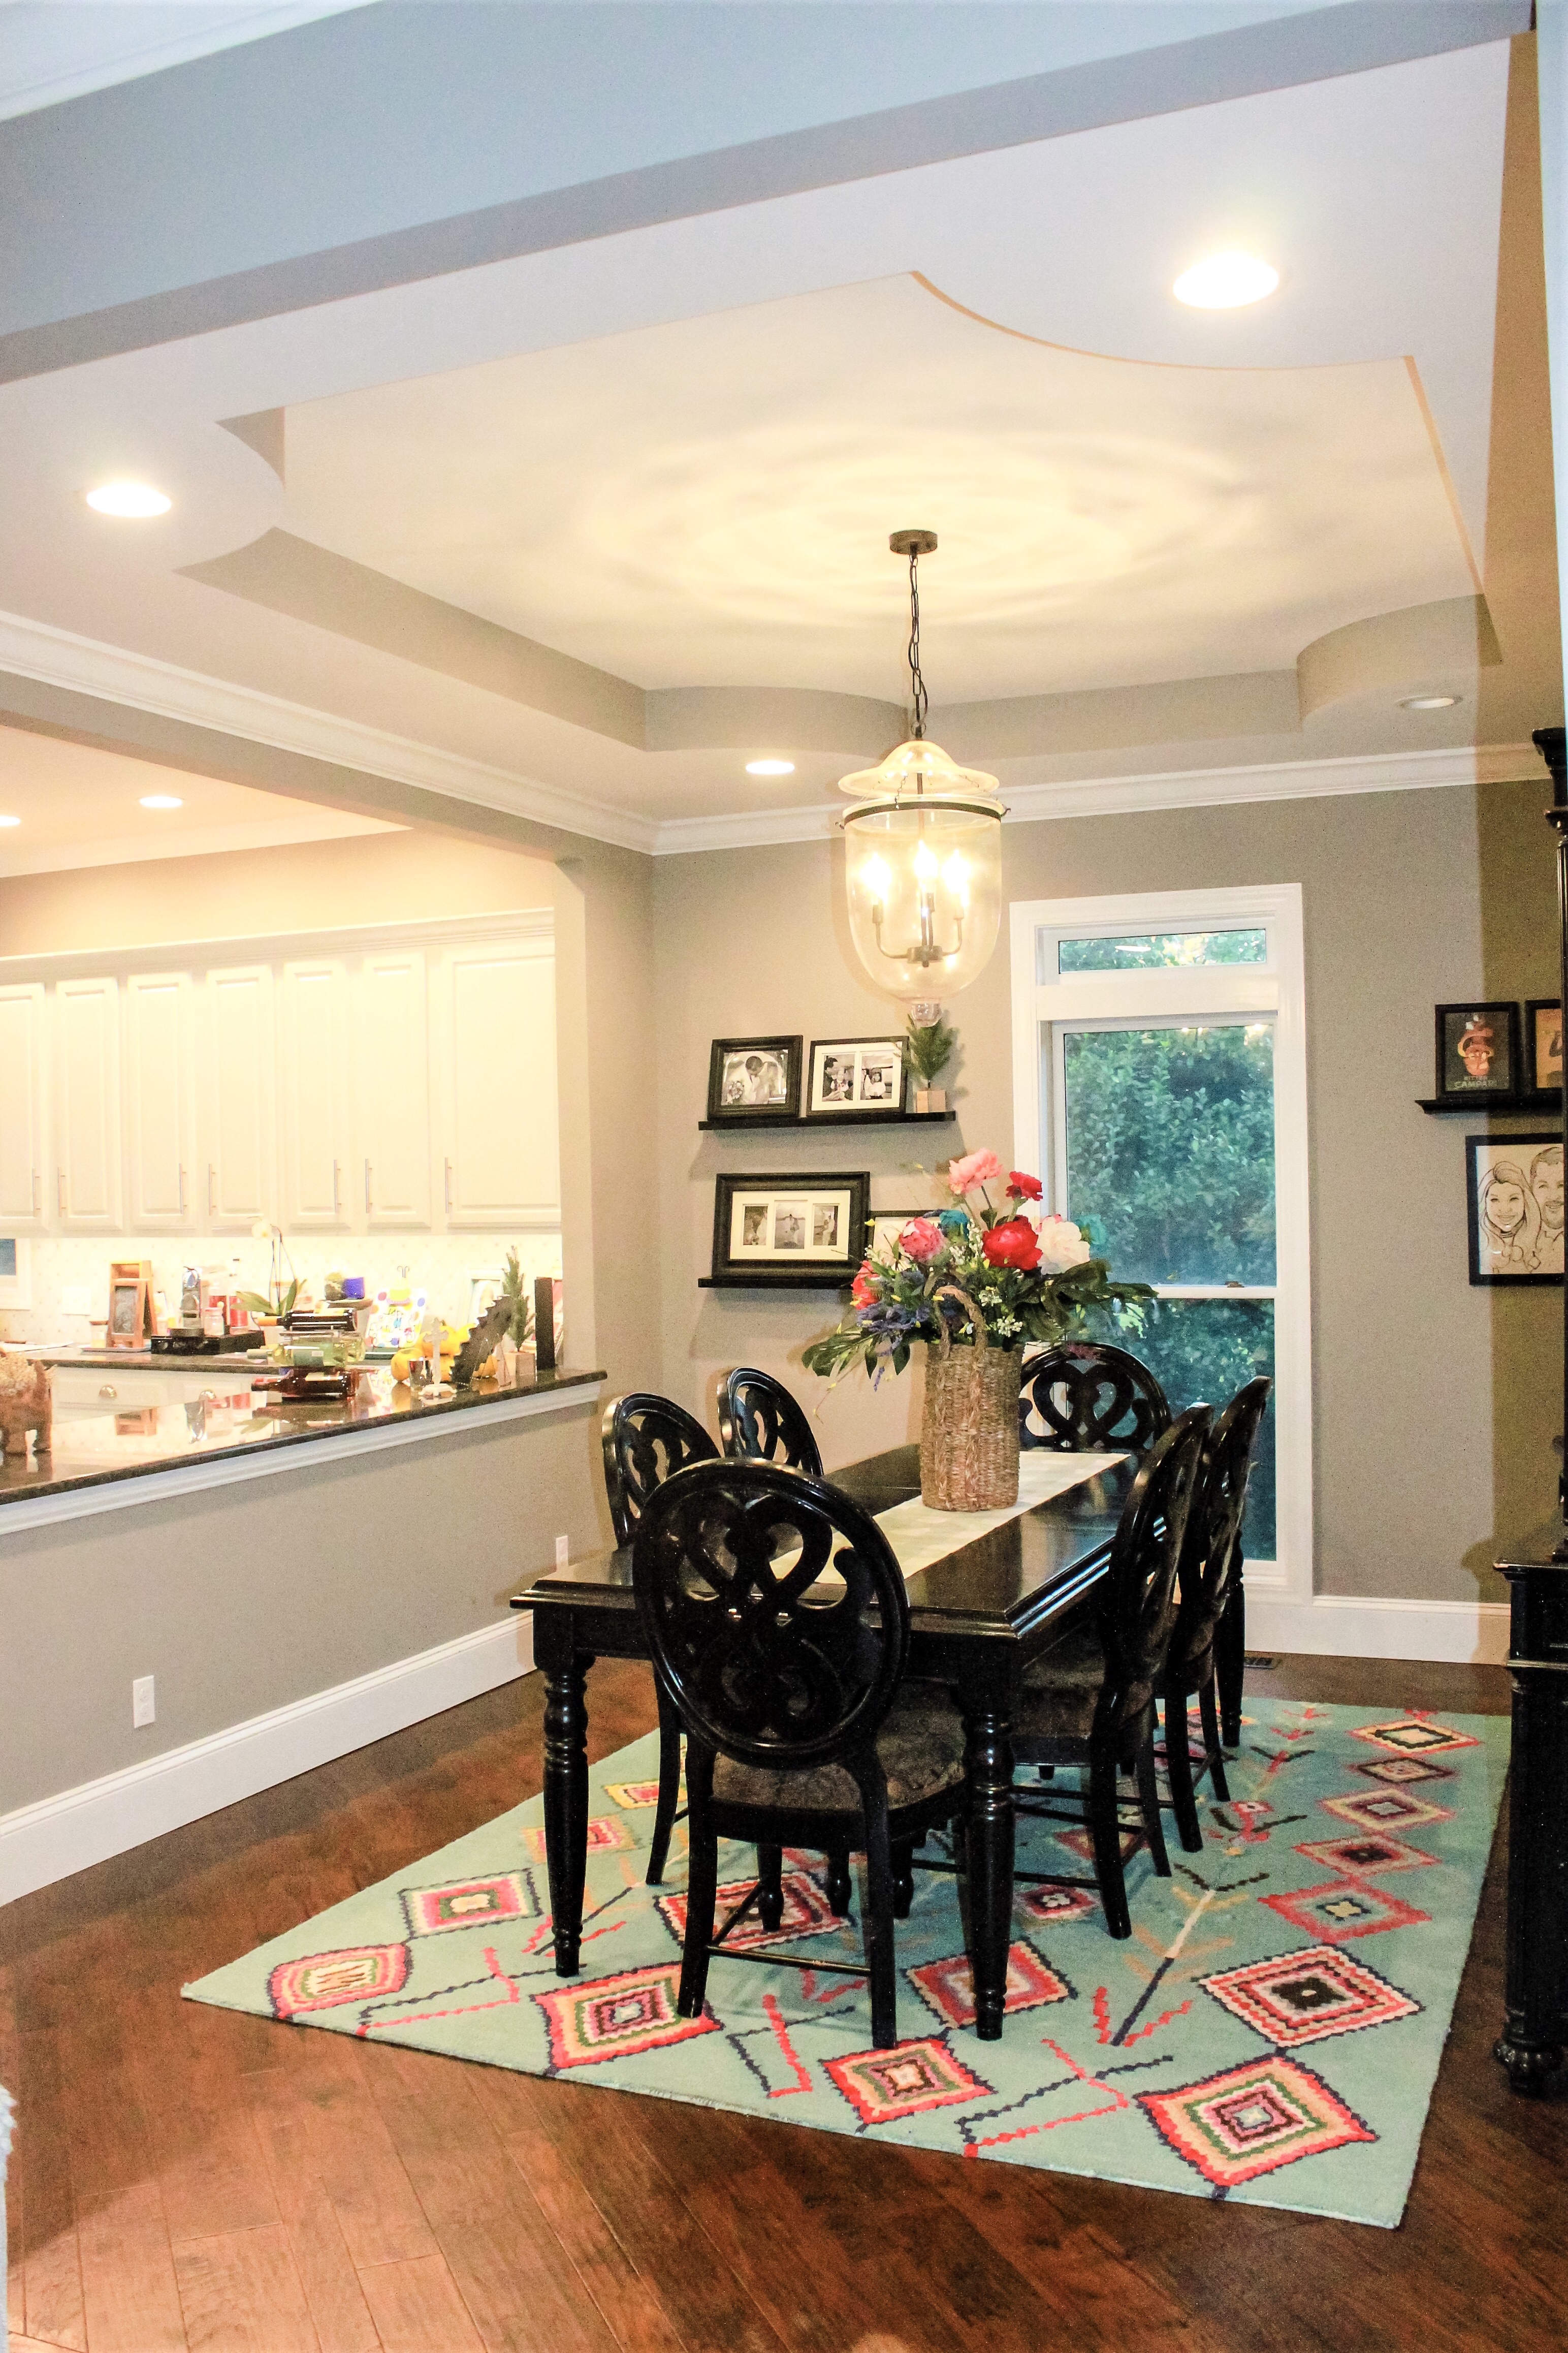
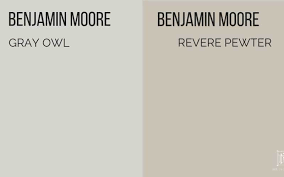
For paint, we kept the same Revere Pewter greige from Benjamin Moore that we used in the kitchen to help with the flow between rooms. Since the ceilings are 10 foot, a standard size crown and base molding seemed too small for the scale of the area. We chose versions much larger, which in turn, made the room seem bigger. The same concept applied when we raised the headers of the openings between rooms. It draws the eye up more and instantly gives the illusion of a bigger, grander space.
For flooring, again we used manufactured hardwood that matched what we used in our kitchen from the Take 1 post. It’s durable, not too dark but not too light, has a great texture and wonderful color variation. By keeping the same flooring between these rooms, it helps with flow and prevents the rooms from seeming choppy.
To replace the chandelier, I chose a large 3-light pendant from Southeastern Salvage in Nashville, TN. I suggest going big with your lighting fixtures because it gives a more dramatic and luxurious feel to the room. Pendants are great but they don’t always provide an abundance of light so we added can lights around the border of the tray ceiling.
Speaking of tray ceiling, I recommend keeping the same shade of white for the upper and lower portions of the ceiling. By painting the lower portion of the tray ceiling the same color of the wall, it really darkens the room and gives it a heavy, smaller feeling. For contrast between the levels of the tray ceiling, we painted only the small vertical portion of the ceiling the same color as the walls. It gives it some dimension but leaves the space feeling lighter and larger.
I have yet to get a curtain up once again but have been enjoying all of the natural light that the window provides. When I do have a curtain made, and I will, it will be a light, modern sconce that coordinates with the Roman shade I’ll have in my kitchen window.
If you don’t have a rug under your dining room table, I highly recommend getting one. Yes, in terms of practicality it doesn’t make sense but it can bring color into the room and tie the furniture together into one space, while adding warmth and style. If you have little ones or sloppy eaters, I highly recommend avoiding light colored rugs for obvious reasons. This one was purchased from Houzz.
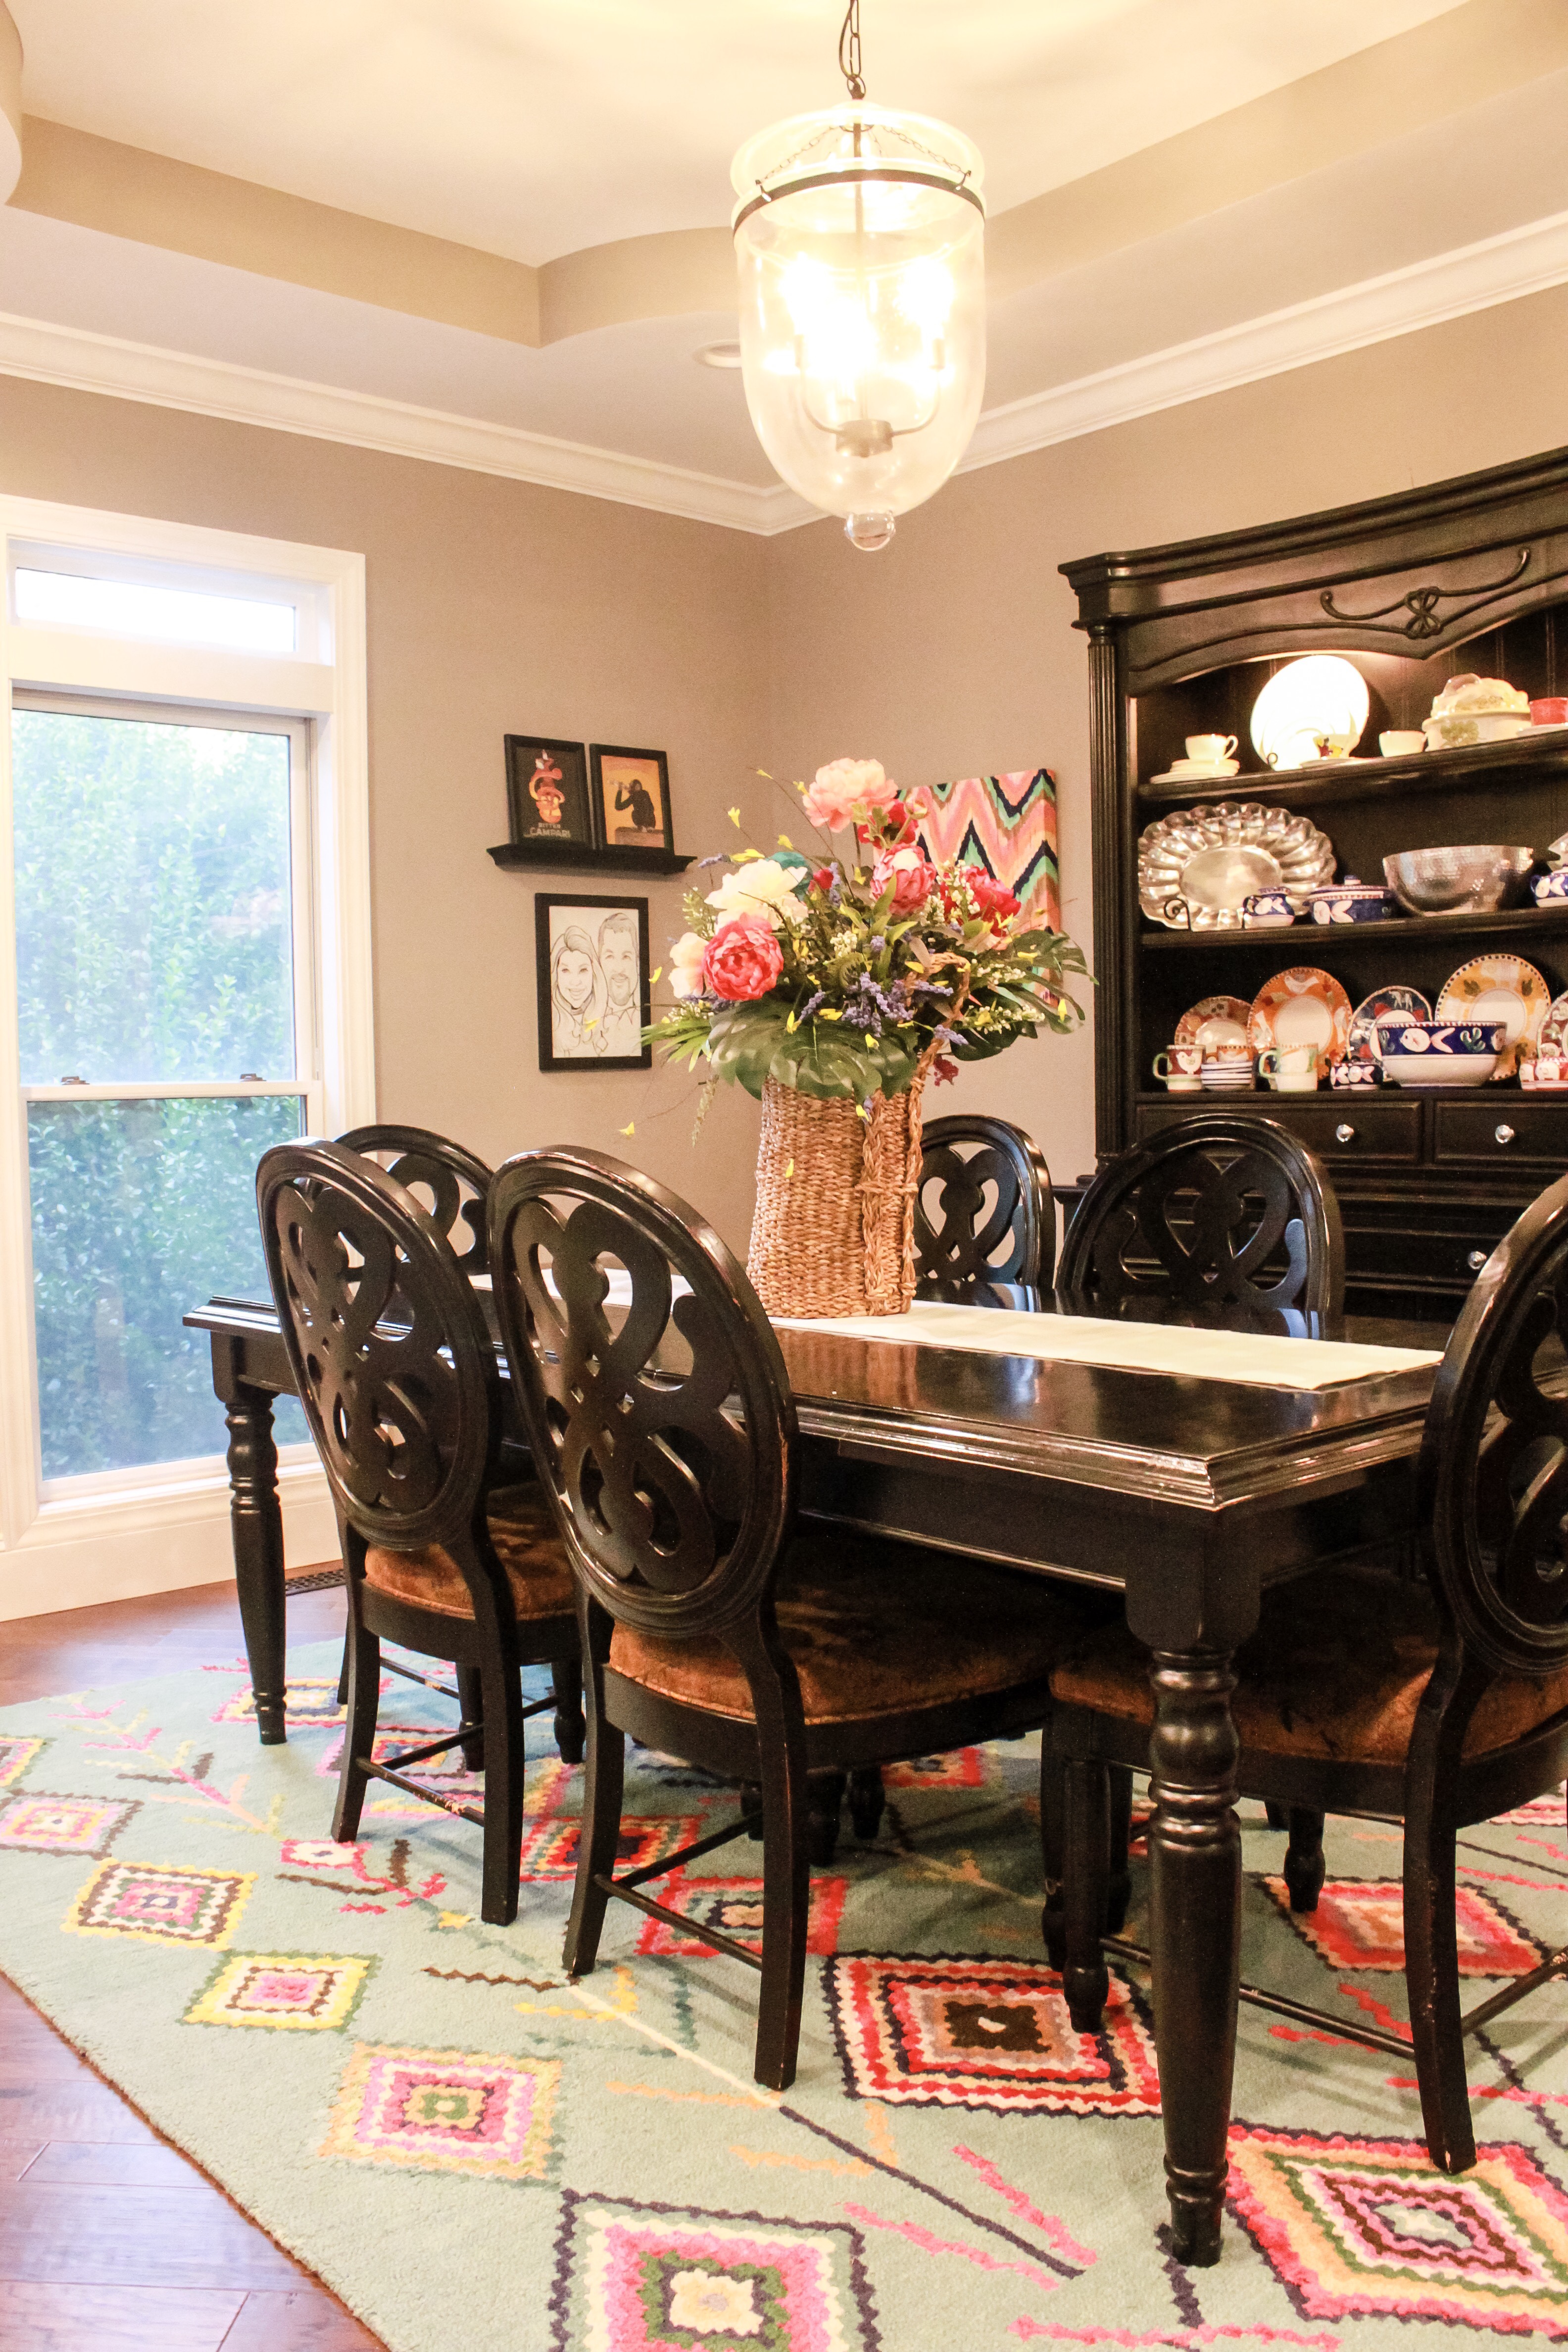
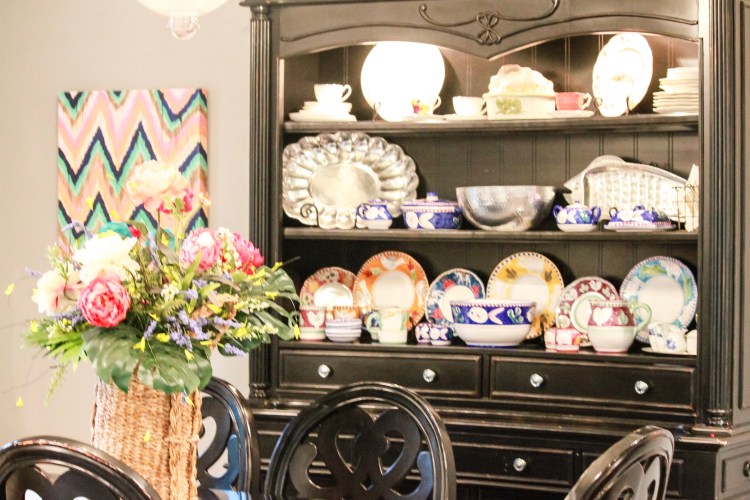
If you have a hutch or china cabinet, it can make for a beautiful display of your more prized dishes and serving ware. When I got married, I opted against traditional china which rarely gets used by anyone, and registered for pottery that is colorful and fun. We actually use ours often, and it gives a bit of eye candy for our hutch. In addition to my pottery, I am a huge fan of pewter serving ware. I registered for many pieces of it when I got married, and it too looks lovely in a hutch or china cabinet. It does get used anytime I’m entertaining, and gives a polished and chique vibe to your spread.

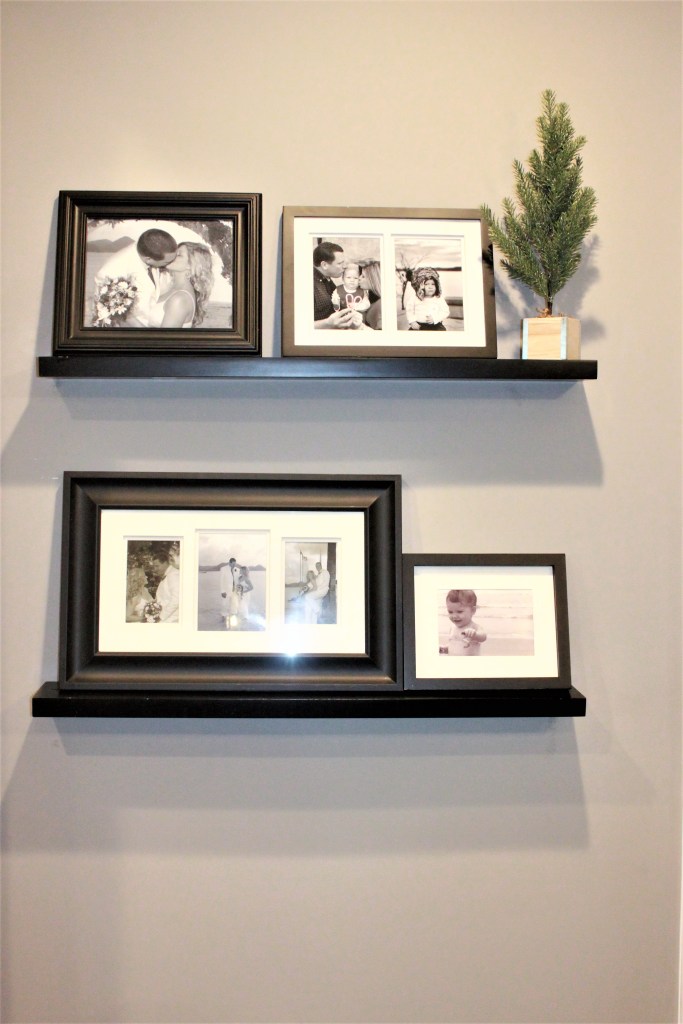
Lastly, decorate those walls, y’all! I brought in more color with two bright paintings whose colors tied in with my rug, along with some shelves to hold pictures. The dining room is a great place to have a gallery wall of sorts to display some of your prized photos. I love the dramatic feel of black and white photography so I made one wall nothing but black and white photos on the shelves. The idea is to group like with like for fluidity so try to avoid placing a color photo next to black and white one in displays. It takes away from the feel and impact of the grouping.
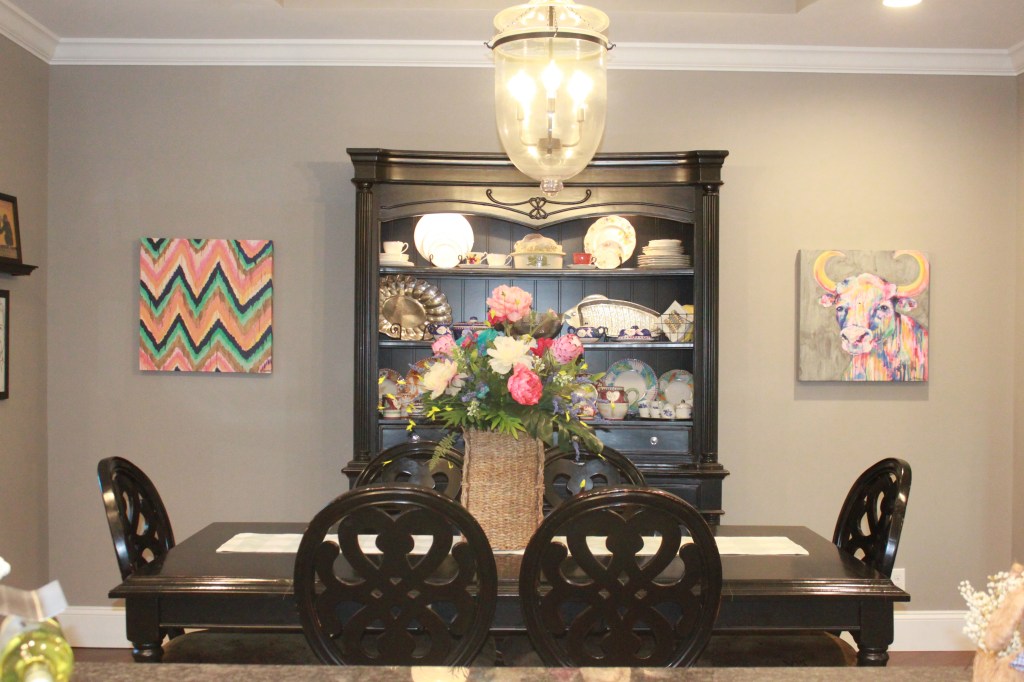
Don’t forget to rock a beautiful centerpiece for your dining room table! Again, it brings in color if that’s your thing and definitely adds drama, in all the right ways, to the room. I stink at floral arrangements so I bought the basket and took it to a local florist, The Prickly Peach, to do the rest. I texted them a picture of my rug, and shazamm, they worked their magic.
I think that about wraps up the dining room’s changes. Needless to say, we use ours much more now than we did in our previous home. If you’re remodeling and debating whether to keep your dining room or forego it for a man cave, I recommend making it as functional as possible for the whole family. Sorry guys!
Do this by making sure the room’s placement in the home makes sense. No one wants to have to pack food three rooms over from the kitchen to dining room. If you’re going completely open concept, help define your eating area by using an area rug and having a hutch grouped with your dining table to make the purpose of the space apparent.
Avoid the stuffy, fancy schmancy/off-limits feel that many dining rooms have. You can make it beautiful without all the pomp and circumstance unless that’s your thang, which is perfectly fine as long as it doesn’t hinder you from using it. Go straight Liberace if that will make you use it more!
I hope this gives you at least a few helpful tips! There’s plenty more before and afters to come! The next post will be the living room so stay tuned. I’ll catch you on the flip side! xo, Christy

I love your post Christy, your dinning room is beautiful and fun🥰
LikeLiked by 1 person
Thank you so much, Cindy! You’ll have to stop by sometime!
LikeLike